The other day during dishwashing, I was a bit clumsy. As a result, one of my favorite ceramic coffee mugs cracked, and another one broke. It was frustrating and heartbreaking. Luckily, I knew how to fix ceramic mug, whether it cracks or breaks.
You can fix a ceramic mug with superglue, epoxy, and even milk. Apply the glue or epoxy mix on the cracked area and put the parts together. Hold the pieces together until the glue starts to work. If it is a hairline crack, you can set the mug in a saucepan with milk and bring it to a boil to fix it.
| Preview | Product | |
|---|---|---|

|
Loctite Clear Silicone Sealant, 2.7 fl oz, 1 Pack - 100%... | Check on Amazon |
|
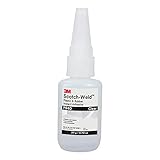
3M Scotch-Weld Plastic & Rubber Instant Adhesive PR40, Clear, 20... | Check on Amazon |

|
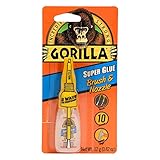
Gorilla Super Glue Gel, 20 Gram, Clear, (Pack of 1) | Check on Amazon |
|
Gorilla Super Glue with Brush & Nozzle Applicator, 12 Gram,... | Check on Amazon |

How you need to fix the ceramic mug depends on the crack or break the mug suffered from. There are at least five different ways to repair a cracked or broken ceramic mug.
Let’s explore the ways in detail!
Quick Navigation
How To Fix A Cracked Ceramic Coffee Mug?
Fixing cracks on ceramic mugs are less complex than repairing broken ones. Most of the things you need are available in your home. Here is a step-by-step guideline to help you.
| Preview | Product | |
|---|---|---|
|
W&P Porter Ceramic Mug w/ Protective Silicone Sleeve, Terrazzo... | Check on Amazon |

|
Francois et Mimi, Set of 6 Large 16 Ounce Ceramic Coffee Mugs... | Check on Amazon |
|
|
W&P Porter Ceramic Mug w/ Protective Silicone Sleeve, Terrazzo... | Check on Amazon |
|
W&P Porter Ceramic Mug w/ Protective Silicone Sleeve, Cream 16... | Check on Amazon |
Things You Will Need
- Cracked mug
- Epoxy
- Hardener
- Paper plate
- Popsicle stick
- Toothpick
- Razorblade
- Dry cloth
Step 1: Find The Crack
Where is the crack? Your first job is to find it. If you notice that it is more like a small scratch, you don’t need to fix it.
But if it is big enough to have a space in it or if the part is coming loose, it needs fixing before things can go worse. It is best not to separate the crack with your hand.
Step 2: Mix The Epoxy Solution
The epoxy solution contains everything you need to apply to the crack. The package will include a hardener, along with a dual syringe to help you get the measurements right.
How much solutions you need to mix will depend on the crack. Take cardboard or a paper plate and pour an equal amount of epoxy and hardener on it. Then mix them well with a popsicle stick.
Step 3: Push The Crack Edges
You need to open the crack a bit more so that the adhesive can enter. Using a razor blade will come in handy in this case.
Push the crack’s sharp edges back with the blade until the crack appears a little wider. Instead of pressing the blade down, hold it forth tightly.
Step 4: Apply The Epoxy Solution
You have to be a little fast here. But don’t stress out. Just use a toothpick to put the epoxy solution in the cracks. You have to do it in three to four minutes.
After that, the solution will start to cure ad will make the task more challenging. Make sure the solution does not dribble out and harden on other surfaces of the mug.
Step 5: Wrap And Wipe
You can wrap around the mug with a rubber band to ensure the cracked area holds together. However, if you think the cracked part is not getting loose, you can skip this part. But use a soft and dry cloth to wipe off the excessive epoxy carefully.
Step 6: Let The Epoxy Dry
Keep the mug aside for 24 hours. It will give the epoxy solution enough time to cure. After that, you can remove the rubber band and clean up the mug to use it.
How To Fix A Broken Ceramic Mug?
Fixing a cracked ceramic mug is one thing. But fixing a broken mug requires a different level of skill and patience. Lucky for you, there is an easy solution for that as well.
Things You Will Need
- Small bucket of sand
- Hand gloves
- Paintbrush/toothbrush
- Epoxy
- Hardener
- Paper bowl
- Popsicle stick
- Toothpick
- Tape
- Dry cloth
Step 1: Gather The Pieces
First, gather all the broken pieces of the ceramic mug. Watch out for the sharp edges. You can wear gloves to prevent any injury. Set aside the parts to make sure you find them immediately when needed.
Step 2: Set The Broken Mug
Place the mug in a small bucket of sand. The main body of the mug should be in the sand while the broken part will be out of it. It helps to hold the mug in a fixed position when you work on fixing it.
Step 3: Clean The Dust
Use a soft toothbrush or paintbrush to brush off all the dust and debris. Cleaning it out will help make the fixing more effective.
Step 4: Mix The Epoxy Solution
Take a paper bowl and pour the same amount of epoxy and hardener. You will find the hardener in the epoxy package.
It will also have a dual syringe to ensure you get the right amount of both solutions. Use a popsicle stick to mix the solution on the plate.
Step 5: Apply Epoxy And Repair
Use a toothpick to apply the solution to the broken edges. Then place the broken pieces on the main body and hold it for at least half a minute.
Wrap both sides of the broken area with masking tape to ensure it stays together. Repeat the process until you have put together all the broken pieces. Then clean the mug with a soft dry cloth.
Step 6: Let The Epoxy Work
After cleaning, set the mug aside on a flat surface so that it wouldn’t fall. Wait at least 30 minutes to an hour for the solution to cure. Then you can take off the tapes and clean the mug again. I recommend not to use the mug for at least 24 hours.
How To Fix A Cracked Mug With Milk?
I know it sounds unbelievable. But using milk does work for fixing hairline cracks on ceramic mugs.
Things You Will Need
- A saucepan
- Milk
- Heat-resistant tape
- Your cracked ceramic mug
The Procedure
- First, apply heat-resistant electrical tape on the crack.
- Do not use regular tape as it will melt in the heat. Make sure to apply the tape from the outside.
- Then place the taped mug carefully into a saucepan.
- Pour milk into the saucepan until the mug is entirely immersed in it.
- Now turn on the stove to heat the milk. The flame should be medium to low but not too high.
- Let the milk boil for around an hour. It has to be long enough to work on the crack.
- Take the saucepan off the stove and let the milk cool down. You can keep it in a cool place for 24 hours.
- Once the time is up, take the mug out of the saucepan and clean it.
- Take off the tapes, and you will notice that the crack has been filled.
How To Repair A Cracked Or Broken Mug With Super Glue?
Cyanoacrylate glue or super glue or crazy glue, whatever you call it, is suitable for quick ceramic crack repair. Here is how you can fix a cracked or broken ceramic mug with this glue:
Things You Will Need
- Superglue
- Electrical tape
- Your cracked or broken mug
The Procedure
- Gather all the broken pieces.
- Apply super glue along the cracked lines or broken areas and put the broken pieces in their spots.
- Apply glue a bit more inside the cracks so that they can soak in.
- Wait for a minute or two and let the glue soak inside the cracks.
- Wipe off the remaining glue before they dry up.
- Now apply the electrical tape on the glued areas to keep the glue inside. You can skip this part if you want to.
- Then set the mug aside for a few hours and let the glue do its job.
- Finally, you can take off the tape if you use them. And your ceramic mug will be good to use after 24 hours.
Advice For Repairing Chipped Ceramic Mug (Tips & Tricks)
Knowing how to fix ceramic mug will help you get the job done. But nothing beats the feeling of repairing a cracked and broken piece like a pro. Check out the following tips and tricks to do the job better.
Clear Nail Polish
If your ceramic mug gets chipped, you can use nail polish to fix it. It is not the perfect solution for the problem. However, it is the best way for a quick fix and smoothening the chipped edge.
But avoid using any regular nail polish. Most of them contain formaldehyde, which is toxic. Use a good quality transparent nail polish to paint over the chipped area.
Repairing With Epoxy
Super glues are good enough for fixing broken or cracked ceramic mugs. However, using epoxy is even better as it is stronger and more durable.
They are more effective, especially if you are dealing with a broken handle. Just put the epoxy mix on the broken area, set the handle in its place, and wait for 24 hours.
Milk Instead Of Glue
I know you have read about using milk to repair ceramic in the above. But I won’t be surprised if you are still having difficulty believing it.
But trust me. It actually works! If you are using milk to fix your ceramic mug, tape the broken part correctly to the mug before placing it in the milk.
Certified Renovation
There is no guarantee that your DIY ceramic mug fixing will work. But that’s okay! We don’t have to be good at everything. You can always take the ceramic mug to someone professional to repair it.
Repurpose
When you realize there is no more use for your cracked mug or the one with a broken handle, you can transform it into something else. Ceramic mugs are excellent as spoon or pencil holders. You can still fix the crack and use the mug like that instead of drinking coffee in it.
Frequently Asked Questions
Q. Can I Use Milk Or Glue To Fix Bigger Cracks In Ceramics?
There is hardly any proof of milk fixing bigger ceramic cracks. If it is a hairline crack, milk is reliable to repair it. However, it would be best if you use glue to repair such cracks.
You can heat up the ceramic mug in the oven to extend the crack first. It will allow you to put the glue without any issue. I suggest using food-safe epoxy if you drink from that mug.
Q. How Long Will A Ceramic Mug Last If I Glue It With Milk?
Honestly, it is hard to tell precisely how long a ceramic mug will last if you glue it with milk. Many people believe that washing the mug wears off because the water damages the repaired area.
It is not an invalid reason. For some people, fixing the ceramic mug with milk lasted 4-5 washes, while it lasted months for many. So I will say it varies from ceramics to ceramics.
Q. How Long Will A Ceramic Mug Last If I Glue It With Epoxy?
Epoxy is one of the most effective and long-lasting solutions for cracked or broken ceramic mugs. It is a mix of resins and hardeners which help to hold the broken parts together.
Fixing with epoxy requires a bit more time and effort. But once you glue it with epoxy, it can last for several months.
Q. Is It Bad To Drink From A Chipped Ceramic Mug?
It depends on whether the chip is inside or outside the ceramic mug. If it is outside, it is safe to drink from the mug as it will not come into contact with your drinks.
On the other hand, if the chip is inside, it is better to avoid drinking from that mug. Ceramic mugs contain paints of various substances. Some of them are harmful to your health. So you need to be careful when it comes to a chipped ceramic mug.
Final Words
Fixing a cracked or broken ceramic mug does not require rocket science. If you do some necessary research, you will know how to fix ceramic mug at home without going through a lot of hassles.
I have already discussed various fixing methods in this article. But if it seems like a lot of trouble to you, you can always get help from a professional or buy a brand new one. Your pick!